Avoiding Phishing Scams eLearning
Client: Concept Project
Year: 2023
Categories: eLearning, Job Aid
Skills: Instructional Design, eLearning Development, Graphic Design
Tools: Articulate Storyline 360, Adobe Illustrator, Figma, Mindmeister
The Concept
This concept project was inspired by an internal phishing campaign where I work. The IT department sends out random “phishing” emails to test employees’ ability to spot and report suspicious emails. After discussing the latest round of emails with colleagues and discovering the number of employees who fell victim to it, I knew that this solution alone wasn’t enough to protect the company from phishing scams that could leave company and personal information vulnerable to hackers. I also wanted to demonstrate that compliance training can go beyond the traditional “tell, then test” model of corporate training.
Most employees are aware of phishing emails, but they don’t know exactly what to look for in an email that makes it suspicious. This indicates a knowledge gap that is not addressed by internal phishing campaigns. The solution I developed is two-fold. The scenario-based eLearning simulation allows employees to practice identifying phishing scams in a safe environment where the consequences of being phished are illustrated and no real harm is done. The job aid acts as a reference for employees and can be displayed prominently in common areas (or printed off and hung at desks).
To create the scenario and job aid, I started with an action map to determine the behaviors employees should take to properly identify a scam along with common behaviors that result in being hacked. Once I had the action map laid out, I started with a text-based storyboard and visual mockups before moving into a prototype and full development.
The Process
Action Map
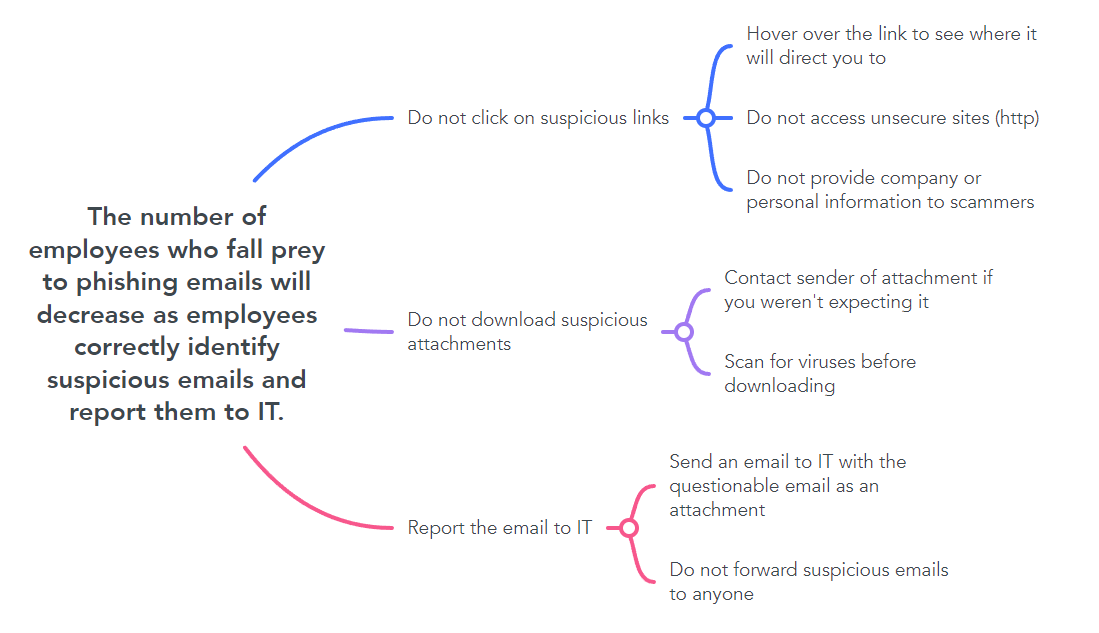
Action mapping is a crucial step of my process when creating a scenario as it helps me identify and focus on the primary business goal that must be addressed. As I created this action map, I focused on the behaviors that lead employees to correctly identify suspicious emails and the common mistakes that lead to divulging personal or company information.
I also made sure that the business goal is measurable and uses a metric that has been measured in the past so that future success can be documented.
Text-Based Storyboard
After completing the action map, I moved on to the text-based storyboard. My main priority in this stage was to create a scenario that would show learners the consequences of falling victim to a phishing attack, rather than telling them. Above all, I wanted the scenario to be immersive and memorable, allowing learners to pull information as they need it.
To accomplish this, I created a mentor character that learners can reach out to if they need assistance and incorporated the same job aid that they’ll see around the office. The mentor provides thought-provoking feedback, while the job provides more straight-forward information. This method allows learners to pull the information when they need it, rather than pushing the information to all learners, whether they need it or not.
Visual Mockups
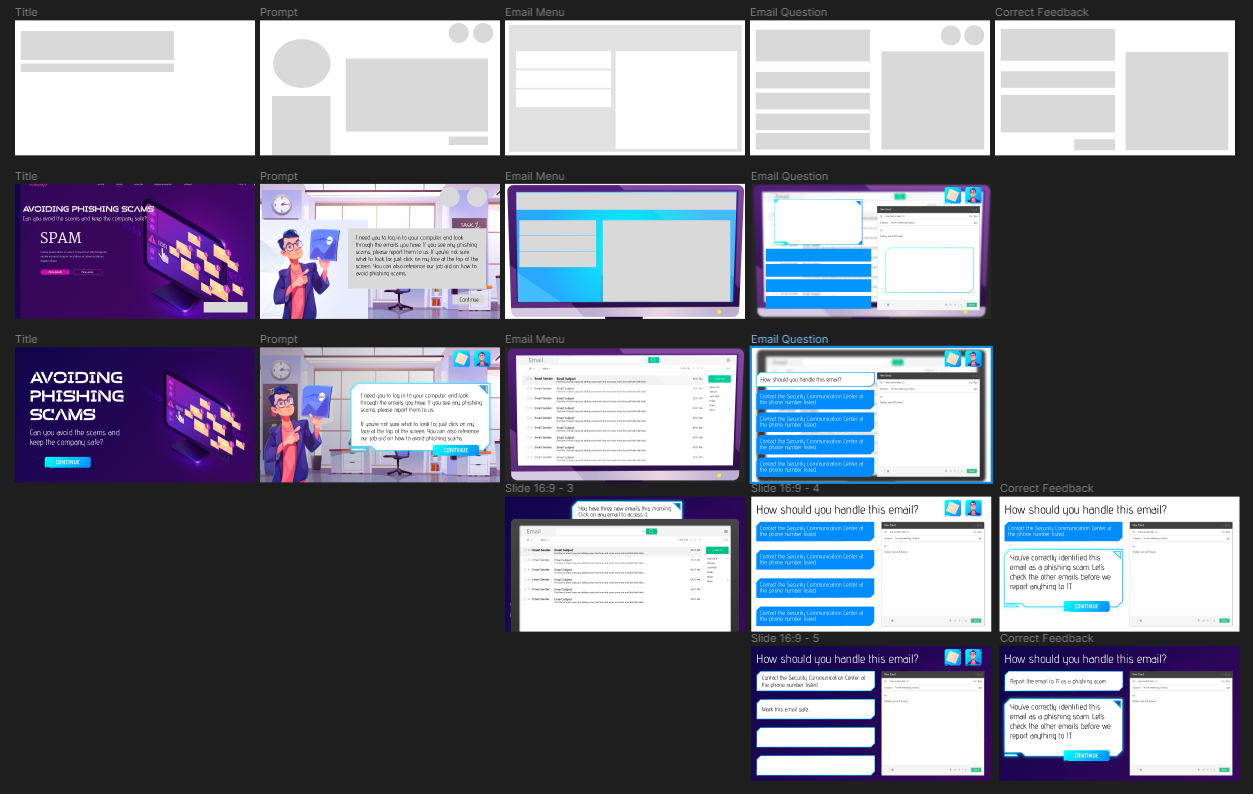
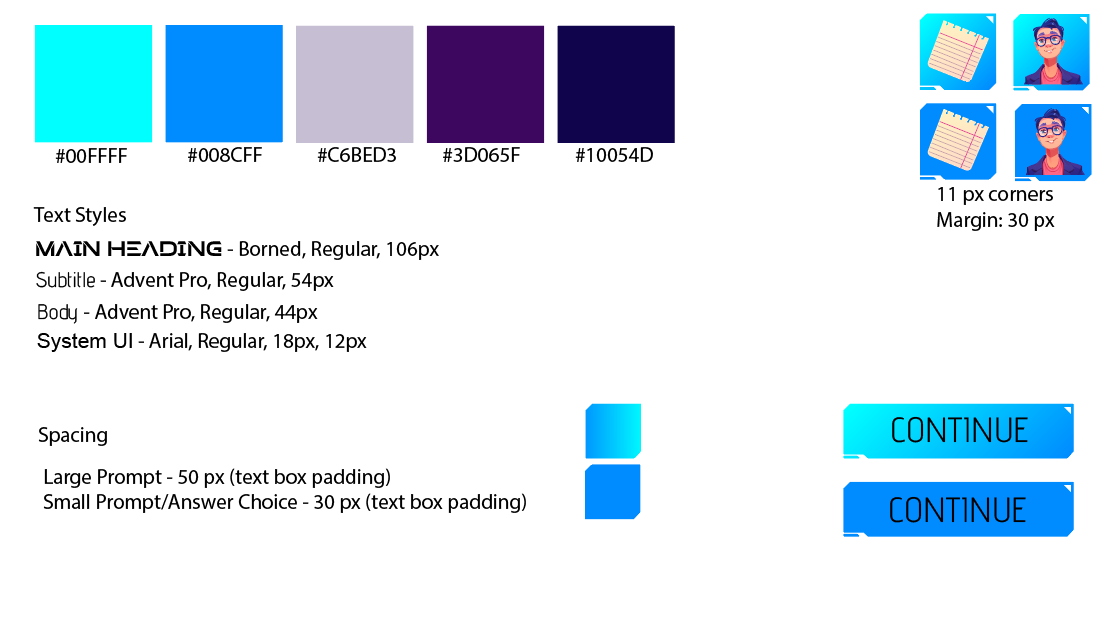
I used Figma and Adobe Illustrator to create a mood board, visual mockups, and a style guide. I find the visual mockup stage to be time-consuming and time-saving as it takes a lot of time on the front end, but saves time in development.
Overall, I wanted the graphics to be engaging, but not overwhelming. I was able to find a variety of dynamic characters and backgrounds on Freepik that I felt accomplished this.
Creating the visual mockups and style guide are also an important step in achieving a professional, consistent look throughout the course.
Visual Mockups
Style Guide
Interactive Prototype
Once the storyboard and mockups were complete, I created an interactive prototype consisting of the intro and first email scenario. This allowed me to test the functionality and obtain feedback on the project before getting too deep in development. Based on feedback, I was able to streamline the project and remove areas of potential confusion.
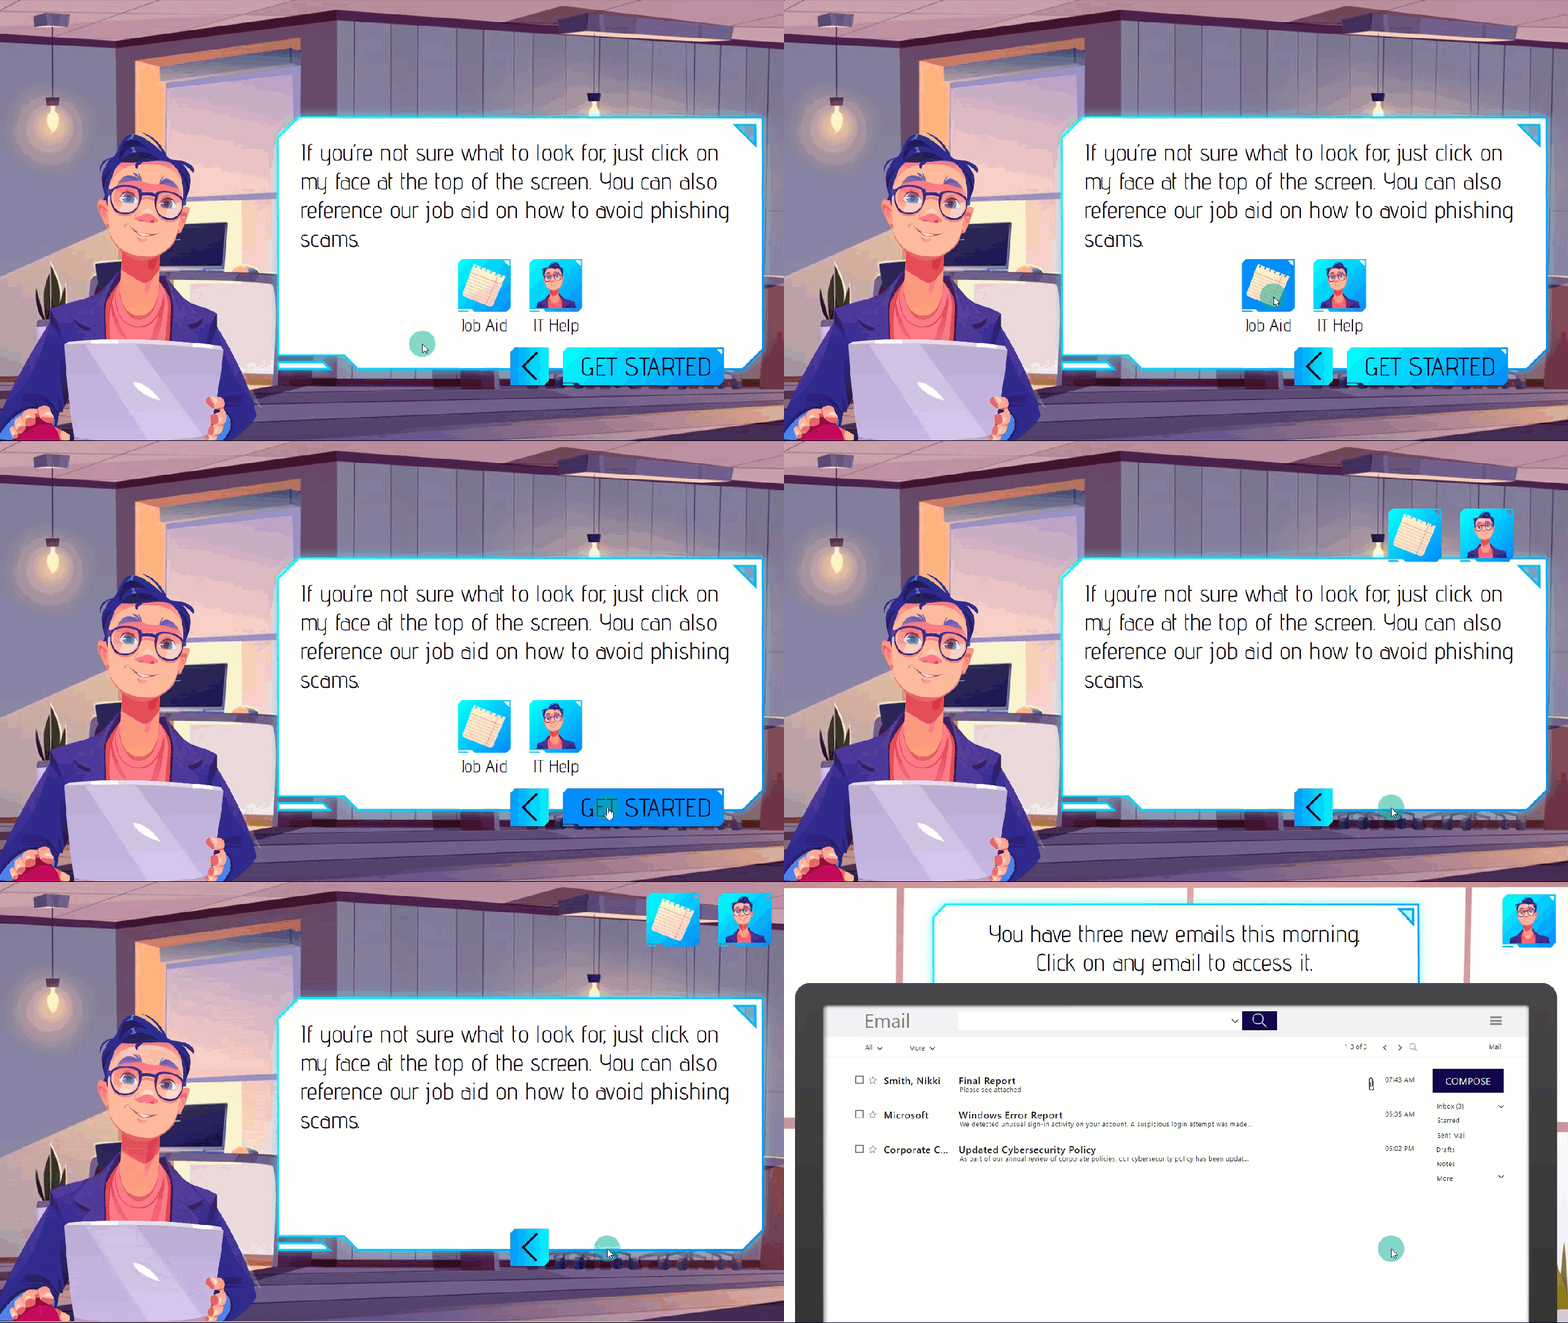
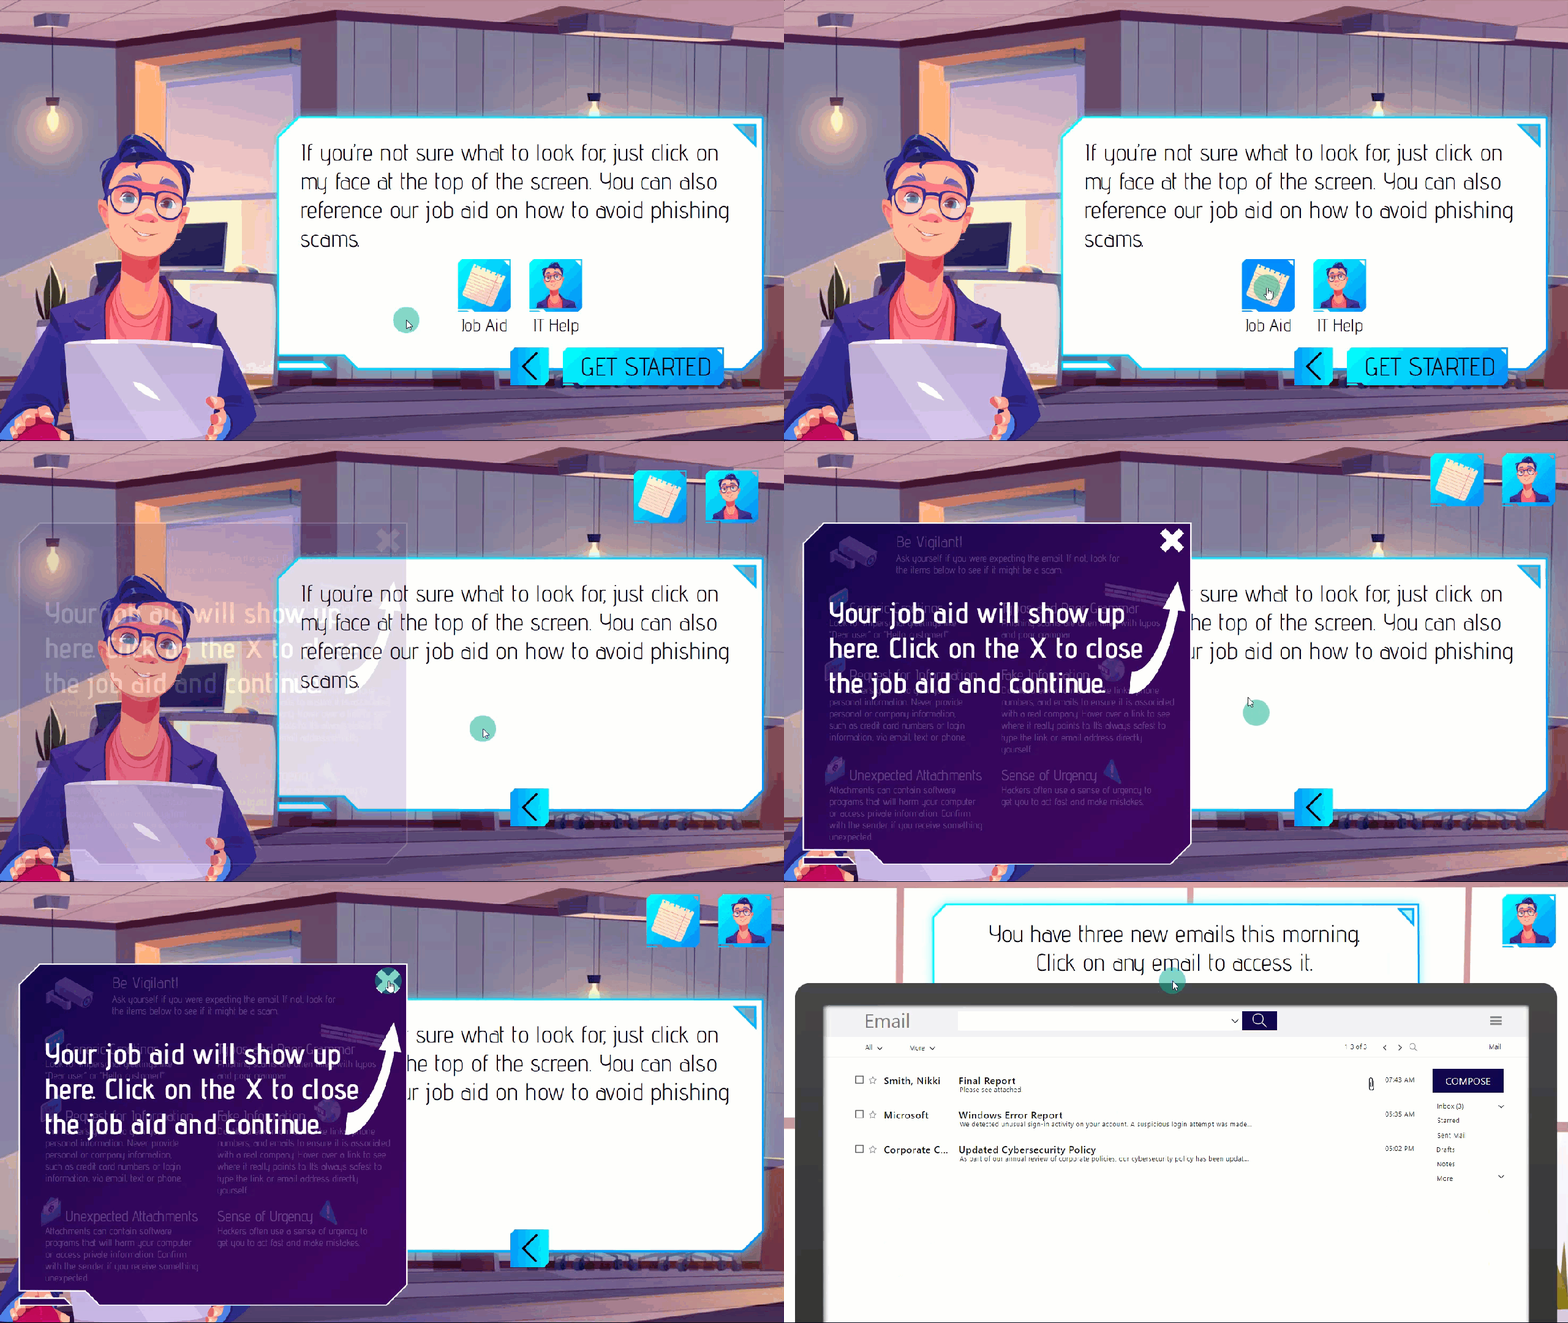
Some of the feedback I received indicated confusion regarding the mentor and job aid buttons on this slide. Several individuals thought they were broken at this point since they have a hover state and look like they can be clicked on. I wanted to keep the visual consistency of the hover state, so I added a click function to progress the slide.
Before feedback - Notice how the job aid and mentor buttons have hover states, but they are not clickable.
After feedback - If the learner clicks on either button, the buttons move to their “normal” location on screen (where they will be for the rest of the course) and the learner sees a preview of what each will look like.
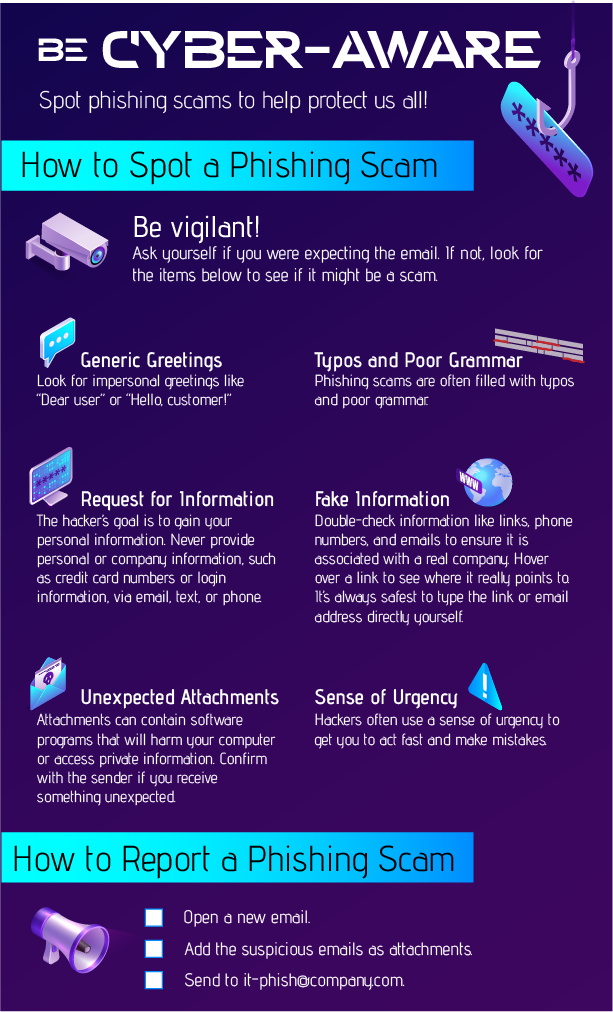
The job aid was developed in Adobe Illustrator using graphics in a consistent style with the course. One consideration I always have for job aids is the cost of printing in full ink. Due to the importance of this topic, I determined that a full ink print would be more eye-catching than a white background or black & white image.
Within the course, only a portion of the job aid is shown to the user, depending on what part of the course they are in at the time.
Job Aid
After implementing feedback from the interactive prototype and fully testing its functionality, I moved on to finishing the development of the project. This went much faster than the prototype did as I already had the majority of the layouts created in Storyline. It was simply a matter of copying/pasting slides and editing the text and graphics. This is when I can really get into the flow of work!
Full Development
Final Thoughts
This project presented a number of challenges. The first and biggest challenge I ran into was how to place the act of identifying emails as a phishing scam into a realistic scenario. No one (that I know of, at least) has ever had the job of sitting at a computer and simply categorizing emails as a scam or as safe. Nor have I ever been asked by IT to immediately look through my unread emails. However, we all categorize our emails to an extent each and every day as more and more phishing emails escape our spam filters. So while my story is not 100% realistic, I believe it is grounded in enough reality to still provide a meaningful and memorable learning event.
The next challenge I faced was identifying the right graphics for the course. I scoured Freepik for characters that I would be able to modify for different slides. There is an abundance of characters with the same flat style of design that I’ve seen in countless eLearning courses. When I stumbled upon upklyak’s graphics, I knew it was the right look for the course. However, I was limited in the number of characters (and the number of poses for each character). I would have loved to have more diversity in the cast, but I had a hard time identifying a character for the IT mentor other than the one I used. I was able to pull from several different images of him and make some modifications to achieve his varied expressions and poses. It would have been much easier to use and modify flat graphics, but they just didn’t have the right feel for the course.
As this was a concept course, I did not have an SME to work with. This proved challenging when identifying the desired behaviors and common mistakes that people make. However, I was able to pull a great deal of information from the Phishing.org website.

